

(Note: As suggested by a reader of mine who has already built these, she recommends that you come up with a drip system for watering because of the heat and to also make them deeper than 6 inches for optimal root growth.)
Dimensions
Dimensions:
24" x 48" x 32" Materials and Tools
Shopping List:
2 - 4x4 fir or cedar post (fir is cheaper and lasts nearly as long)
2 - 1x8x8 cedar boards
2 - 1x3x8 cedar boards
1 - roll of 1/4" hardware cloth 50x24" (make sure to get hardware cloth with 1/4" holes, 1/2 inch is too large and all your dirt will fall through)
16 - 2 inch 14-20 hex bolts
16 - washers
16 - Threaded inserts (http://www.grainger.com/Grainger/Hex-Drive-Threaded-Insert-4ZU78)
12 - 1 1/2 inch brass or galvanized screws
Tools:
measuring tape
square
pencil
safety glasses
hearing protection
drill
compound miter saw
Cut List
Cut List:
Legs: cut the 4x4's into 4 - 32 inch legs
Sides: cut one of the 1x8x8 into 2 - 48 inch lengths
Ends: Cut one of the 1x8x8 into 2 - 24 inch lengths
Bottom slats: cut the 2 - 1x3x8 into 6 24 inch lengths
Bottom hardware cloth: cut the hardware cloth into a 24x50 inch rectangle.
Sides: cut one of the 1x8x8 into 2 - 48 inch lengths
Ends: Cut one of the 1x8x8 into 2 - 24 inch lengths
Bottom slats: cut the 2 - 1x3x8 into 6 24 inch lengths
Bottom hardware cloth: cut the hardware cloth into a 24x50 inch rectangle.
General Instructions
Please read through the entire plan and all
comments before beginning this project. It is also advisable to review
the Getting Started Section. Take all necessary precautions to build
safely and smartly. Work on a clean level surface, free of
imperfections or debris. Always use straight boards. Check for square
after each step. Always predrill holes before attaching with screws.
Use glue with finish nails for a stronger hold. Wipe excess glue off
bare wood for stained projects, as dried glue will not take stain. Be
safe, have fun, and ask for help if you need it. Good luck!
Step 1
 |
I cut all pieces out and assembled the bed using one or two pin nails on
each side of the leg to hold together...I then used a hand drill to
drill the three or two holes(which ever you decide on) onto each side
piece only going through the the side piece and only marking the legs.
The leg holes really need to be drilled as straight as possible and at
the depth you need for your bolts. I used a drill press to make sure of
the depth and that the holes are very straight to except the thread
inserts.
You can read the bit below for other info but I would definitely use the hand drill for marking the legs.
Drill your three holes in the 1x8 pieces then place them against the 4x4 pieces in the location they need to be(I set up all the pieces and number the legs and the boards and draw arrow for the top on the boards for later reference then using one pin nail on each side to hold it all together I mark where the holes will go on the legs) and using a center punch hammer into each hole marking the 4x4 so you can drill the corresponding holes. I used all 1/4-20 screws and I used E-Z LOK threaded inserts instead of drilling all the way through the 4x4. I made sure that I drilled the hole deep enough in the 4x4 so that when I inserted the thread and bolted the sides on I would be able to screw them on tight.
Step 2

He is an image of the planter upside down with the 1x8 bolted into place
Step 3
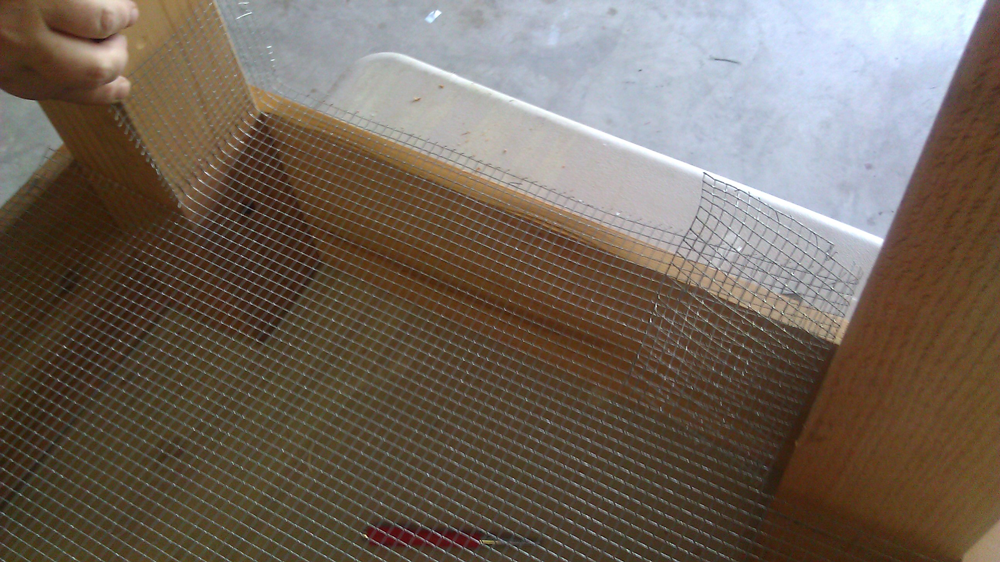
Attaching the hardware cloth. I made sure that
when the planter was together that it was no more then 24 inch wide this
way the hardware cloth would fit the width without me having to sew
together or cutting down the width. I only had to cut the length because
I purchase hardware wire that was 24 inches wide by 25 feet long. I can
make 6 planters with this one roll of hardware wire.
Step 4

close up of how staple the hardware cloth around the legs.
Step 5

Once the hardware wire is stapled into place I
need to add slats to the bottom so that the weight of the soil will not
pull off the hardware cloth.
Step 6

placing the slats equal distances apart and screwing into the bottom using two screws in each end of each slat.
Step 7
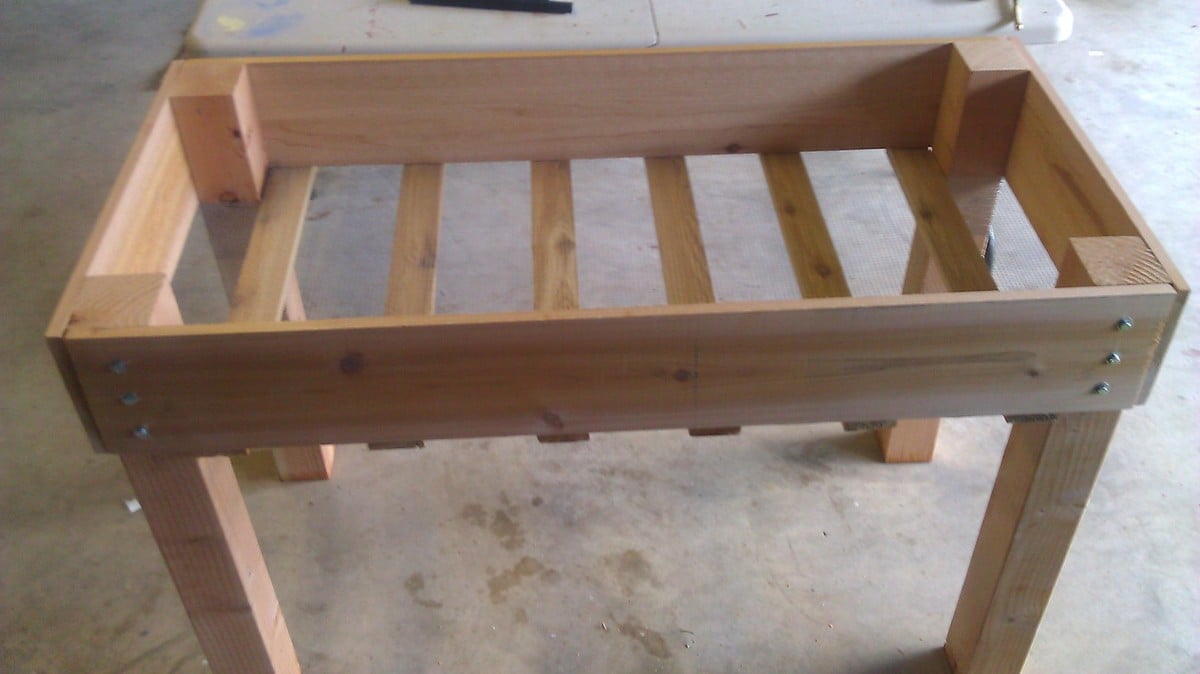
The planter turned right side up
Step 8

another close up
Step 9
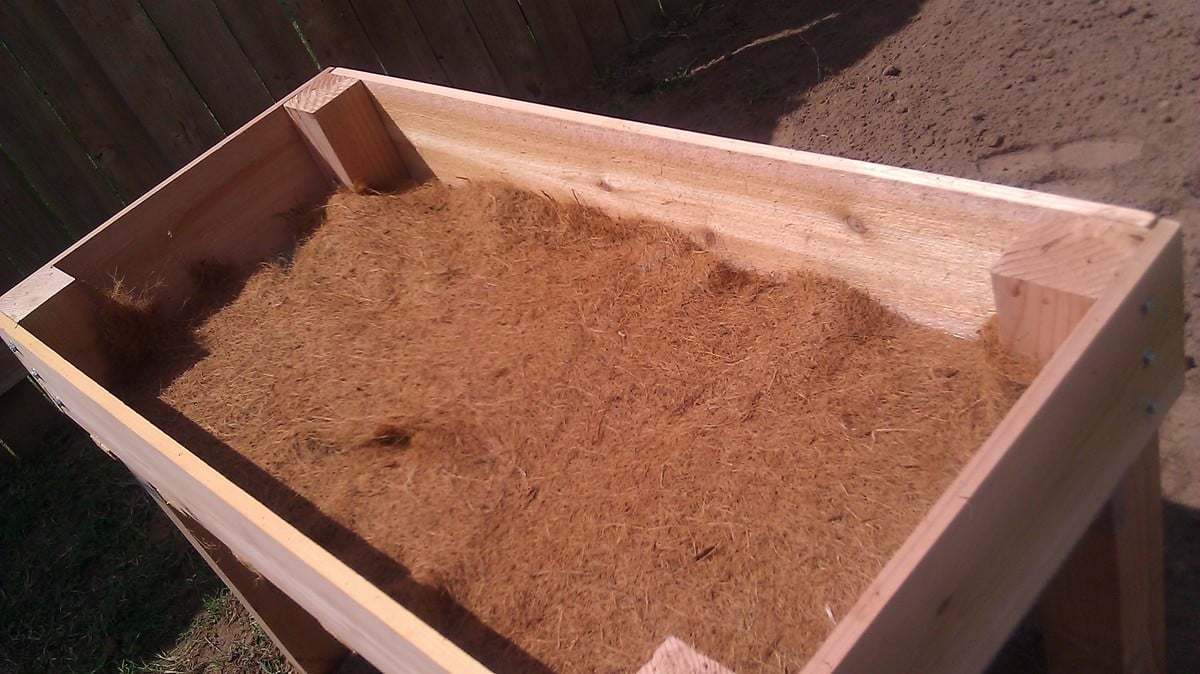
used coconut cloth in the bottom however you
could use newspaper, compost or anything that isn't harmful to the soil
and your plants to keep the dirt in.
Step 10
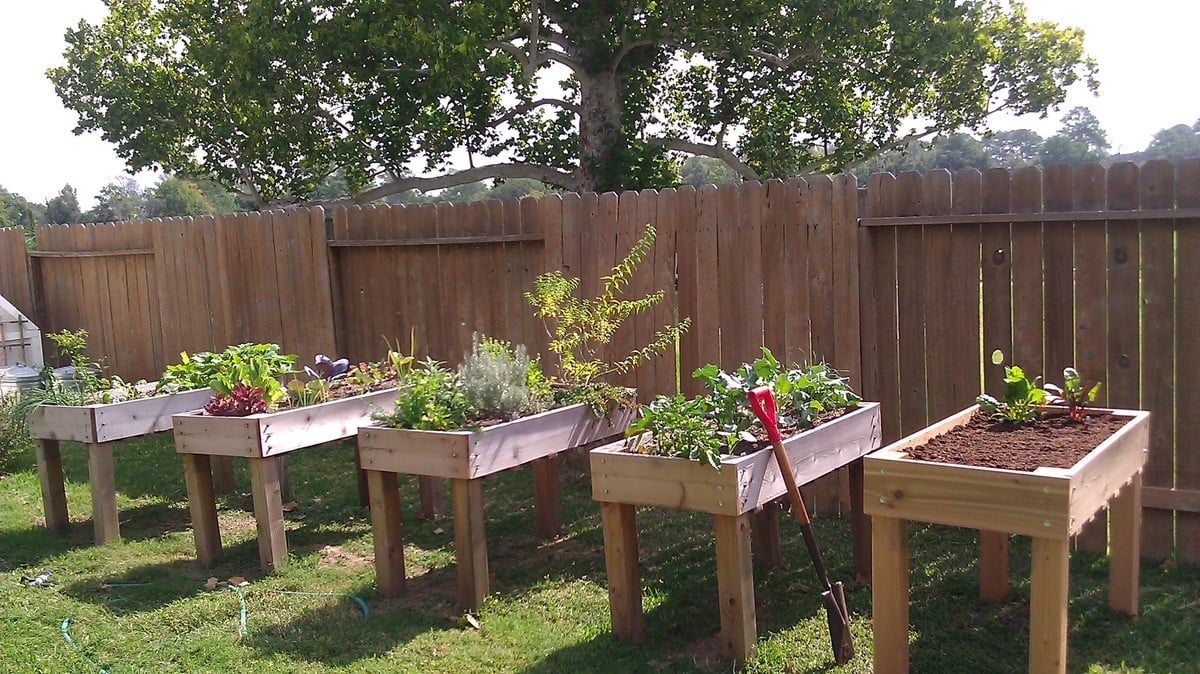
And this is how my garden grows.
Finishing Instructions
Preparation Instructions:
Fill all holes with wood filler and let dry. Apply
additional coats of wood filler as needed. When wood filler is
completely dry, sand the project in the direction of the wood grain with
120 grit sandpaper. Vacuum sanded project to remove sanding residue.
Remove all sanding residue on work surfaces as well. Wipe project clean
with damp cloth.
It is always recommended to apply a test coat on a hidden area or scrap
piece to ensure color evenness and adhesion. Use primer or wood
conditioner as needed.
This has several advantages....no kneeling or bending....rabbits cant eat your garden...you can move them around if needed....easier to cover and easier to keep harmful bugs away. I love it!
ReplyDelete